It's time for a new Designer Challenge on the Elizabeth Craft Designs Blog today. For April's challenge it's all about using the Scissor Spring Mechanisms Die by Becky Seddon. The inspiration for my project was Krista Schneider's Cacti stamp. With the cacti stamp in hand, I set out to create this clean and simple You're so Sharp! Notecard. Make sure to read below as I have a tutorial for you so that you can re-create my You're so Sharp! Notecard at home. Make sure to read all the way down to the bottom of the post as there's some information on how to get in on the fabulous giveaway from Elizabeth Craft Designs.

To start, die cut the small Scissor Spring Mechanism out of White Soft Finish Cardstock. To assemble the scissor spring, slide the two pieces together where the slits are, this will create two diamonds. Cut one of the diamonds off. Fold the top and bottoms so that they face out.

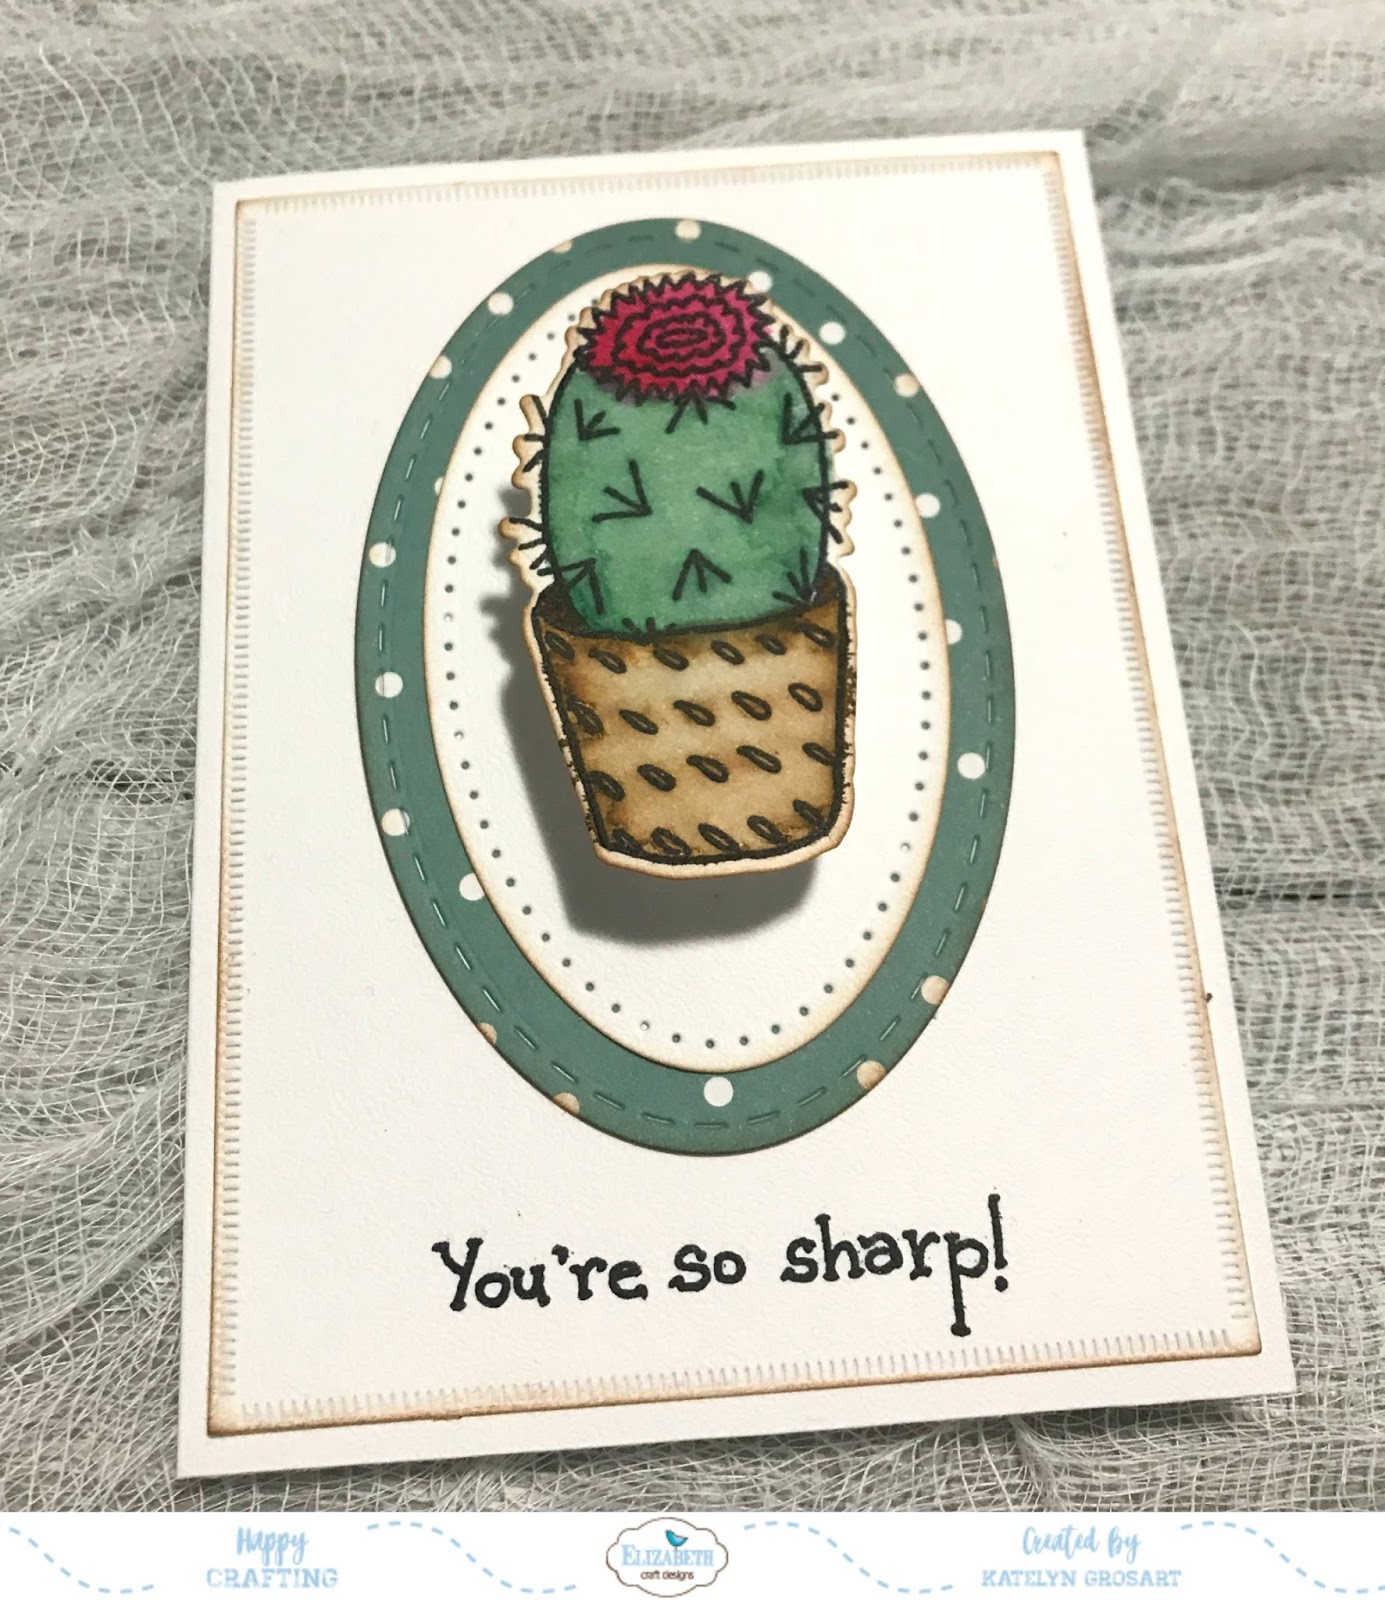
Apply Jet Black Archival Ink to the Cacti stamp and stamp onto a piece of White Soft Finish Cardstock. Place the co-ordinating die overtop of the cacti and run it through your die cutting machine. Watercolour the plant pot using Tombow Markers number 969 and 977. To watercolour the cacti use Tombow Marker number 249. For water colouring the top of the cacti, use Tombow Marker number 847. Ink the edges of the cacti using Vintage Photo Distress Ink and a blending tool with foam.

From the Dashing Rectangles die, die cut the 3 1/2" dashing rectangle out of White Soft Finish Cardstock. Ink the edges of the rectangle using Vintage Photo Distress Ink and a blending tool with foam. Apply Jet Black Archival Ink to the "You're so Sharp!" stamp and stamp at the bottom of the rectangle.

From the Stitched Ovals die, die cut the 2 1/2" stitched oval out of green patterned paper from the Thinking About...Rio De Janeiro Paper Pack. Ink the edges of the stitched oval using Vintage Photo Distress Ink and a blending tool with foam.

With the Stitched Ovals dies still out, die cut the 2" stitched oval out of White Soft Finish Cardstock. Ink the edges of the stitched oval using Vintage Photo Distress Ink and a blending tool with foam.

Adhere the 2" White Soft Finish Stitched Oval to the 2 1/2" Patterned Paper Stitched Oval. Adhere the 2 1/2" patterned paper stitched oval to the middle of the cardfront.

Adhere the scissor spring mechanism to the back of the cacti image. Adhere the scissor spring mechanism to the middle of the 2" stitched oval.

To finish your notecard, cut a piece of White Soft Finish Cardstock that measures 5" x 7 1/2", score at 3 3/4". Adhere your cardfront to the cardbase.
Here are a few close up photos of the You're so Sharp! Notecard.


*******************
For today's challenge Elizabeth Craft Designs are giving away a $20 Gift Card to use on our website to 3 winners.
To enter simply leave a comment on the Elizabeth Craft Designs Facebook Giveaway Blog Post or the Elizabeth Craft Designs Challenge post and tell us What Elizabeth Craft Designs dies or stamp sets would you use with the Scissor Spring Mechanism die set to create a card, scrapbook layout of home decor item?
We will select 3 lucky winners in a random drawing
The winners will be announced on Friday, April 20th on the Elizabeth Craft Designs Blog and our Facebook page.

*****************
Elizabeth Craft Designs Products Used:
- ModaScrap: Thinking About...Rio De Janeiro
Other Products Used:
- Tim Holtz for Ranger Ink: Distress Ink - Vintage Photo & Blending Tool & Foam
- Ranger Ink: Jet Black Archival Ink
- Tombow Markers: 969, 977, 249 & 847
- Katelyn
No comments:
Post a Comment